
Table of Contents
Nerf Nation! Get ready to take your Nerf Apollo back to Rival Schools…
It’s time for the Nerf Rival Apollo Mod Guide!
That’s right, guys! It’s time for your old Nerf Rival Apollo blaster to learn some new tricks! Here today, we’re going to go over a breakdown of all the steps you need to take to recreate these Nerf mods in the safety of your own home. I will write a fairly detailed description of every step I take along the way, but if you need more info or you’re unclear about something, well then take a look at my YouTube video: Nerf Rival Apollo Mod Guide.
These mods are all along the entry-level spectrum for modders, so if you’re just beginning your Nerf modding career, you’ll be able to follow along just fine. This is an easy set of mods and it turns out to be very rewarding in the end. So without further adieu, let’s begin… Welcome to the Nerf Rival Apollo Mod Guide!
Required Tools for this Modification.:
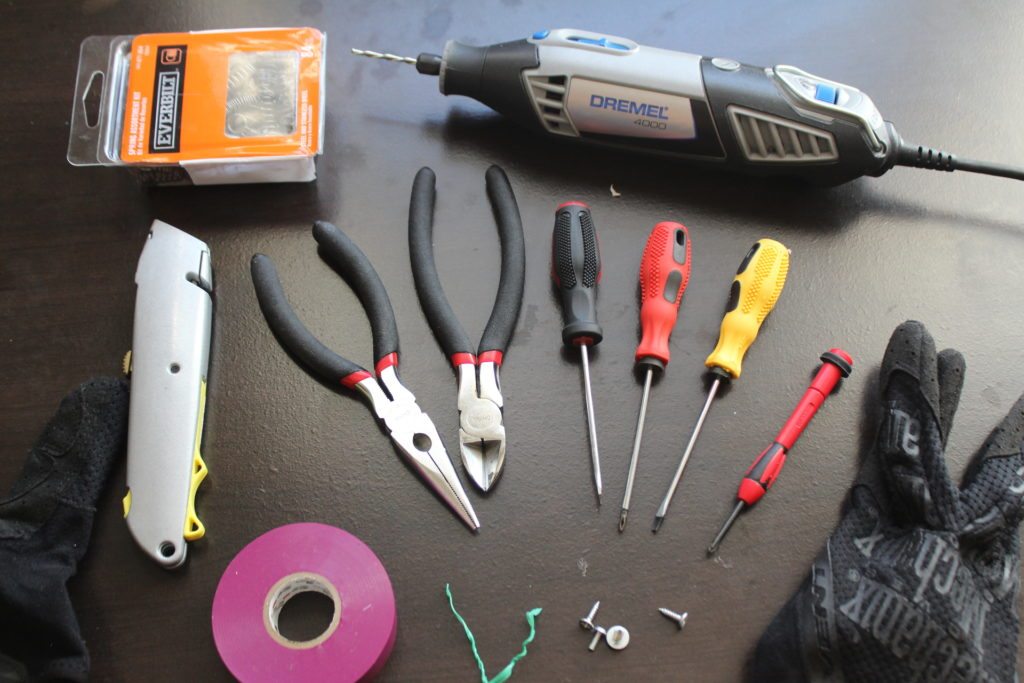
For this Nerf Rival Apollo mod guide, you’ll need a few supplies. Nothing crazy here — most of these tools you should already have laying around the house. I used a couple of screwdrivers, some electrical (or pvc, teflon, etc.) tape, a pair of needle nose pliers, some side cutters, a box cutter, a couple of screws, the twist wire from a loaf of bread (lol), a box of springs, a rotary tool, and some work gloves. Another item that I used is some Silicon Grease (not pictured) to make sure the internals were well lubricated.
If you need any (or all) of these tools, I’ve compiled a list of all of these, or similar, items on Amazon.com. Check out the full list here: Required Tools List.
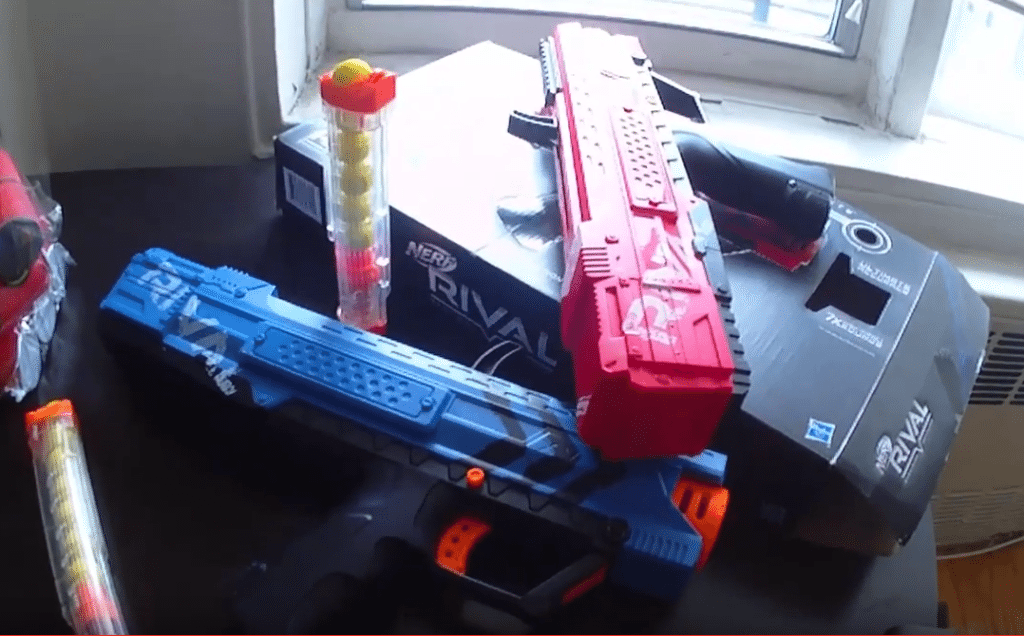
Step 1: Unboxing The New Nerf Rival Apollo Blaster.
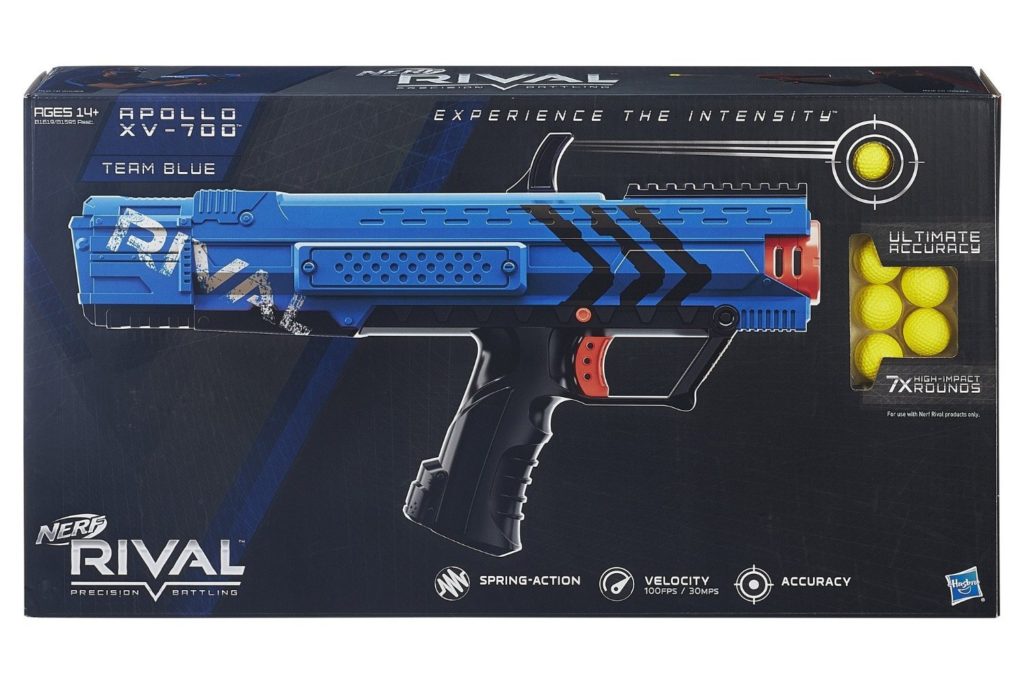
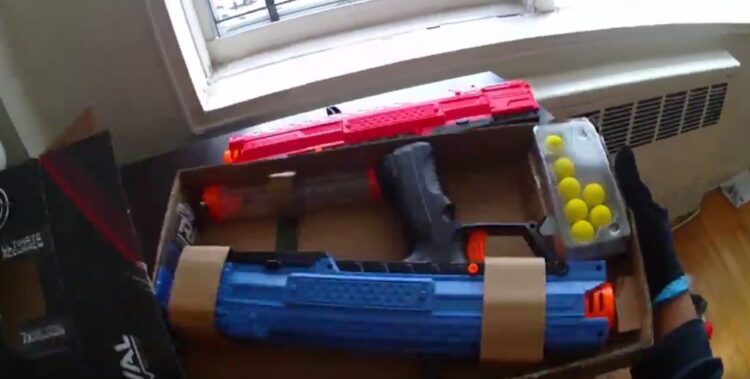
Now, this rule doesn’t apply if you’re just modding a blaster that you already own. But, for this Nerf Rival Apollo Mod Guide, I’ve opted to mod a fresh Rival blaster, straight out of the box. Before I shot my review video, I had already modded my red Apollo. I just jumped right into without waiting to set up the camera — Yes, I was that excited. Anyways, pretty typical stuff here. You can see me quickly unbox my blue Apollo blaster in the YouTube video if you like, but it’s all a standard affair.
Also, in case you didn’t realize, you do obviously need a Nerf Rival Apollo, too, obviously. So make sure you have one or two before you start this Nerf Rival Apollo mod guide. I mean… what would you even be modding if you started the guide without the blasters? Okay, I’ll stop. I’m confusing myself now.
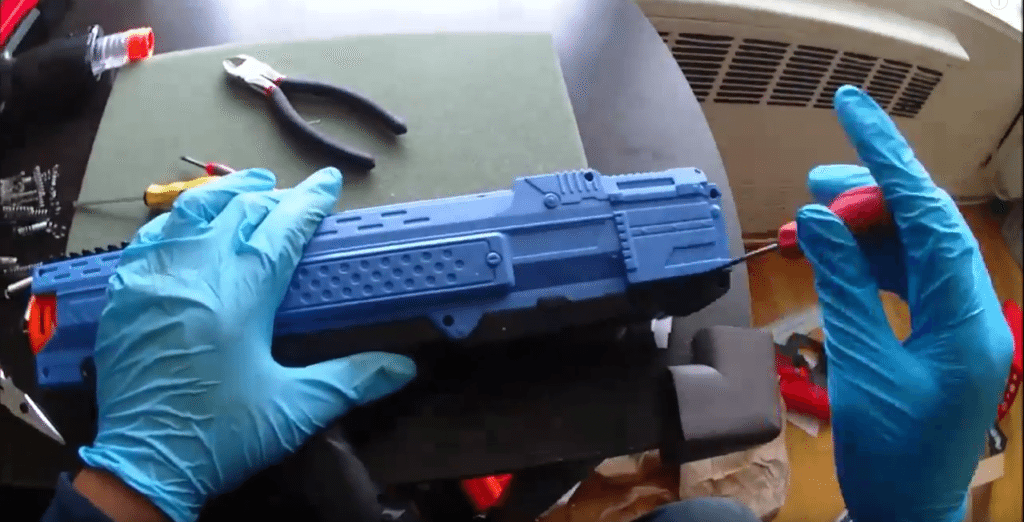
Step 2: Nerf Rival Apollo Disassembly.:
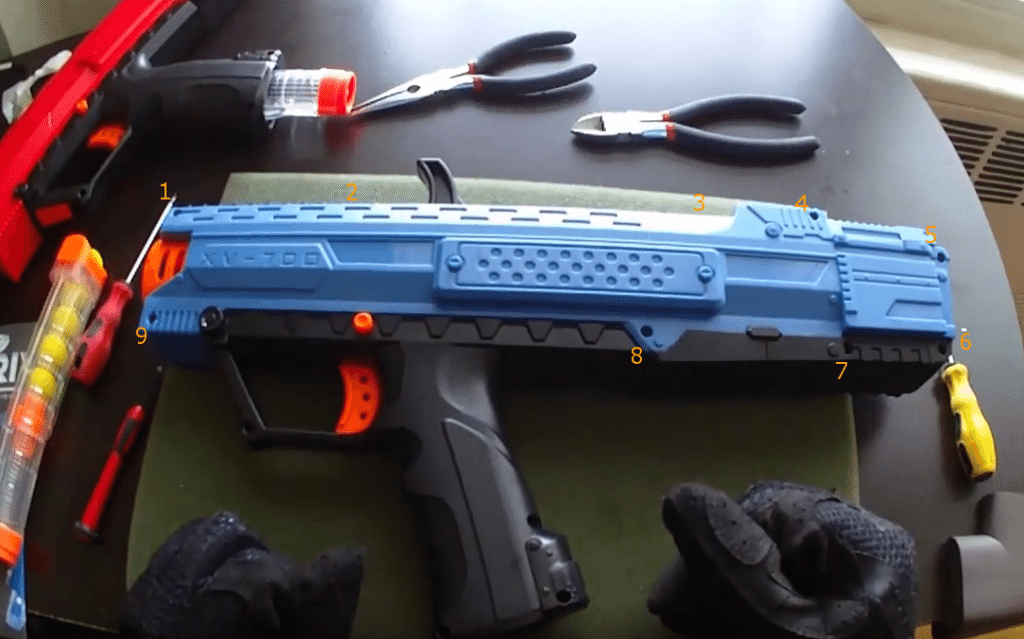
For the next part of this Nerf Rival Apollo mod guide, you’ll want to disassemble the Nerf Rival Apollo blaster. In total, there are 13 screws in the Nerf Apollo. Luckily, we won’t have to open up the pistol grip handle, so that’s 4 screws we won’t have to touch. That leaves us with 9 screws that must be removed from the Apollo. I’ve outlined them in the picture above, but you can click the pic to see me do it in the video.
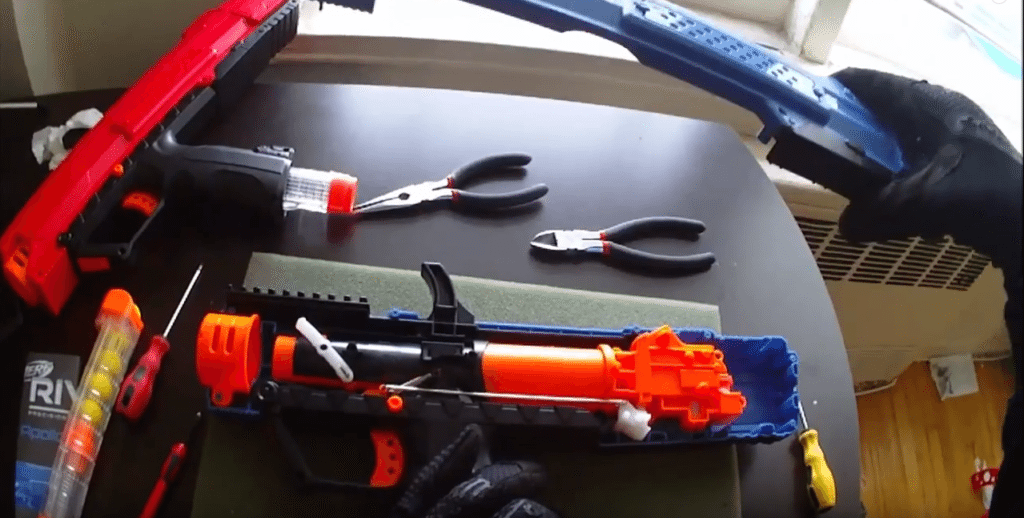
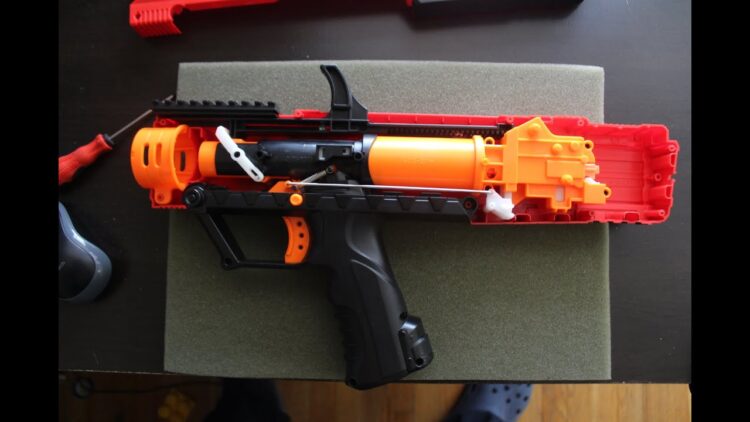
This is what you’ll find after you remove all of the screws and separate the two pieces of the blaster shell. The top half will lift right off of the other half — this is just like any other Nerf blaster. Inside, you can see the muzzle, barrel, the plunger tube, and the gearbox.
Step 3: Removing the Mechanical Locks.:
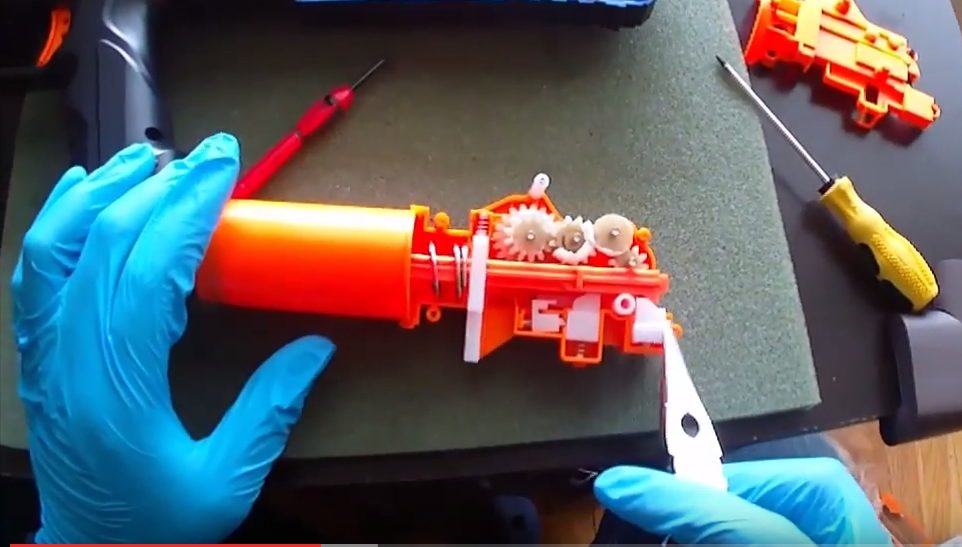
In the picture above, all of the white pieces on the bottom half of the gear box, under the actual gears, are mechanical locks. They are all basically useless and can be discarded without another thought. There are three locks on the bottom and another one is underneath the back of the plunger rod. You can see it after you lift the plunger tube/rod out of the gearbox assembly.
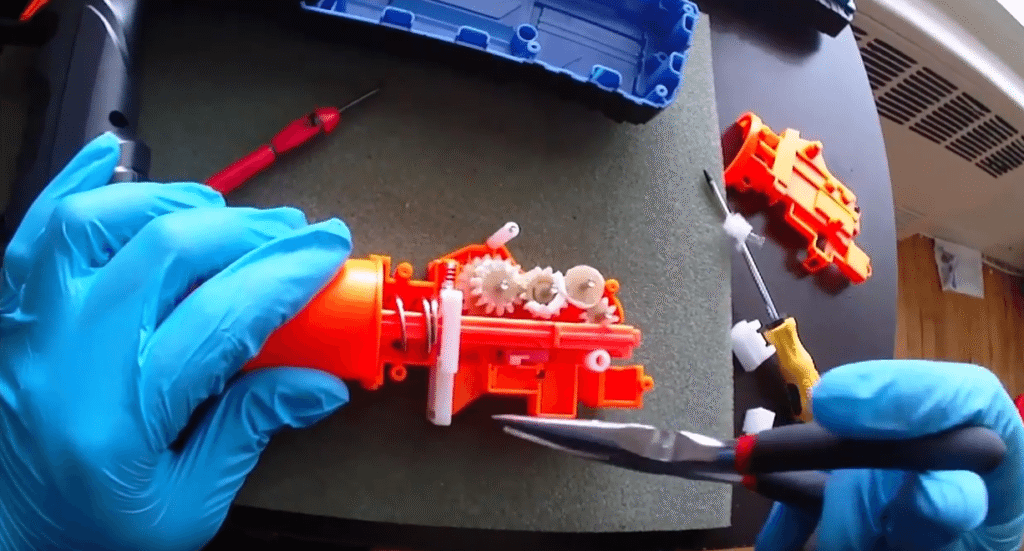
Almost done. The three locks on the bottom have been extracted, all that remains is the last lock under the plunger rod. Don’t throw away that dowell on the bottom. It holds a metal pin which helps align the plunger rod and keep the gearbox strong and sturdy.
Step 4: Taping Up The Plunger Head.:
This part of the Nerf Rival Apollo Mod Guide takes place just after I’ve pulled the plunger rod out of the plunger tube. As you can see in the background of the picture, the whole plunger tube assembly can separate from the gearbox. Slide the plunger rod out of the tube and you should see the plunger head with the black rubber o-ring around it. Gently remove the o-ring using a flathead screwdriver and set it aside.
Next, using your tape, cut a long, thin piece of tape and wrap it around the space under where the o-ring used to be. You can wrap tape all the way around the plunger head a few times. When you’re done, put the o-ring back into place, gently stretching it over the top of the plunger head. After this step, you’re done with the plunger tube, so you can reassemble the whole thing and place it off to the side.

Step 5: Going Back For One More Lock.
Just when you thought you were done removing locks, another one is discovered right by the trigger! The nerve of them, right? I know, I know. Anyway, on to the lock removal. And this one is going to be the toughest, most invasive removal yet. But, I’ve heard of this one causing jams in blasters, too. So, let’s do this! I just like to go right at it with my side cutters. This lock is enclosed in a little plastic prison, so you actually have to cut it out. If you’ve modded before, I find this to be similar to removing air restrictors.
I suggest you just go at it with a Dremel or something like that, because this thing was frustrating for me to remove. You have to cut away all the bits of plastic holding the lock in and then pry it out with a pair of pliers. But shaving off every bit of plastic holding this lock in place is a pain. Since there aren’t really any vital parts of the blaster too close to the lock, I’d suggest just drilling a big hole through it, clean to the other side. But that’s just me.
Step 6: Adding the Priming Handle Return Spring.:
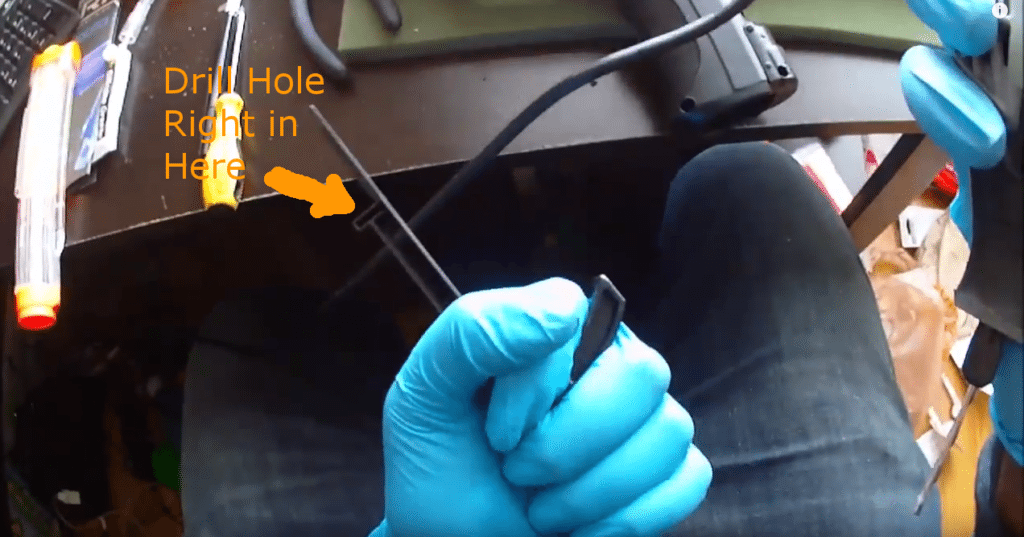
This is the part of this Nerf Rival Apollo mod guide where things get a little more intensive. Make sure you know how to operate a power tool (drill, rotary tool, etc.) before proceeding here. And wear safety goggles. Seriously. Anyways, for this section, you want to drill a small hole in the plastic right where the arrow is pointing.
If you plan on using a screw to hold the spring in, make sure you use the appropriate drill bit for the screw you want to use. I’m using a slightly more bootleg method for adding the return spring in this Nerf Rival Apollo mod guide, so the size of the hole isn’t as important.
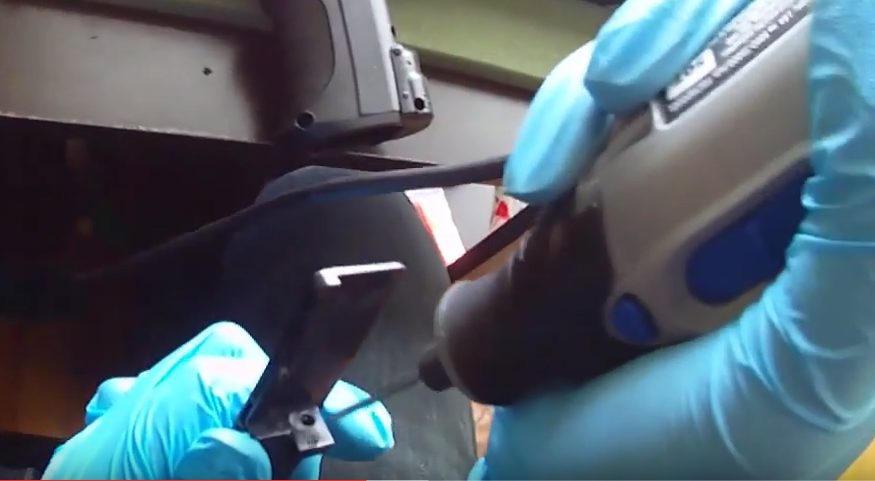
In this picture, you can see the exact location that I drilled the hole in the priming handle slide mechanism thing. (lawl). If you need further clarification, click the pic above to check out the full video on YouTube. (For your information, most of the pics that look like screen grabs — they are screen grabs, and they all link back to my Nerf Rival Apollo Mod Guide YouTube video.)

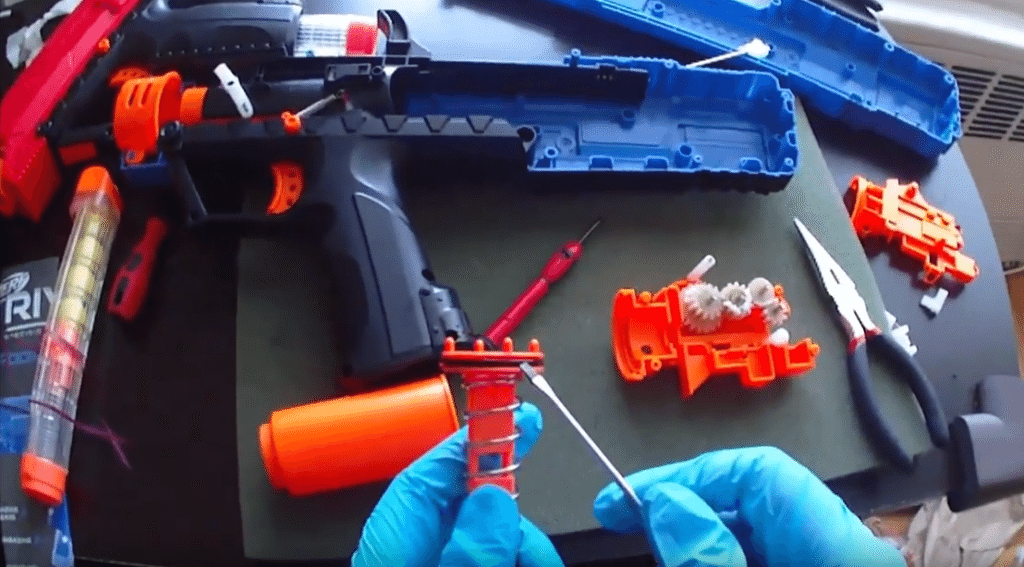
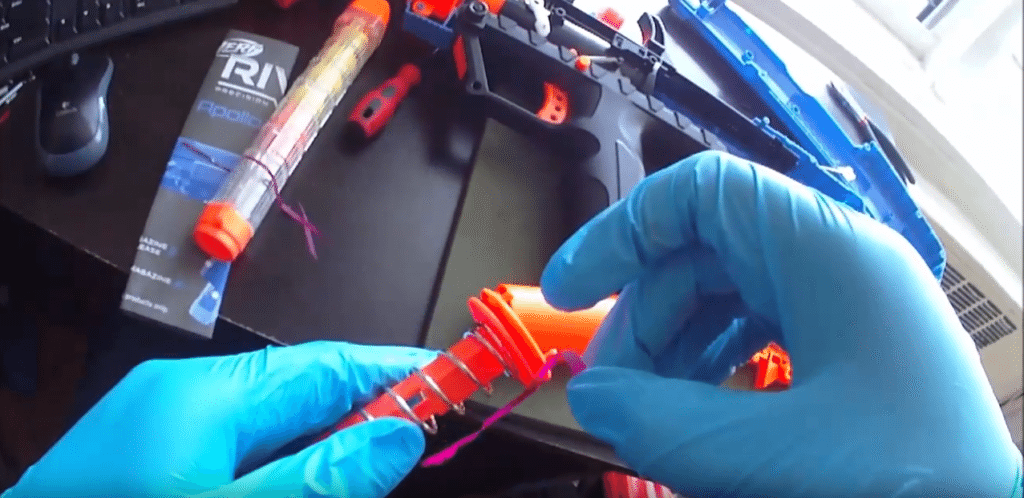
Here, I’m just inserting my spring into the hole made by my Dremel drill bit. I used the drill bit that was included with my Dremel (info here), and the spring is a 5/32-Inch by 2-1/2-Inch extension spring that I picked up. You can find those anywhere, including in my “Required Tools” list that I link to up above. Anyway, I was able to squeeze the end of the spring right through the hole that I drilled. It popped into place and was almost good enough to function right away.
This is a bad picture, but what it’s supposed to show is me inserting the bread twist tie through the gap in the plastic and hooking it through the end of the spring, I think. Curve the other end of the twist back out and twist it together like you would on the loaf of bread. This has effectively held the spring in place for me in both of my Nerf Rival Apollo blasters, through many magazines.
Step 7: Breech Control, or Where to Add Another Spring.:
That one spring that we added to the priming handle in the last step of this Nerf Rival Apollo mod guide? It’s nice and all, but it’s not enough. All it really does is return the handle to the front, but the handle will get tripped up on another piece before it has a chance to make a full return.
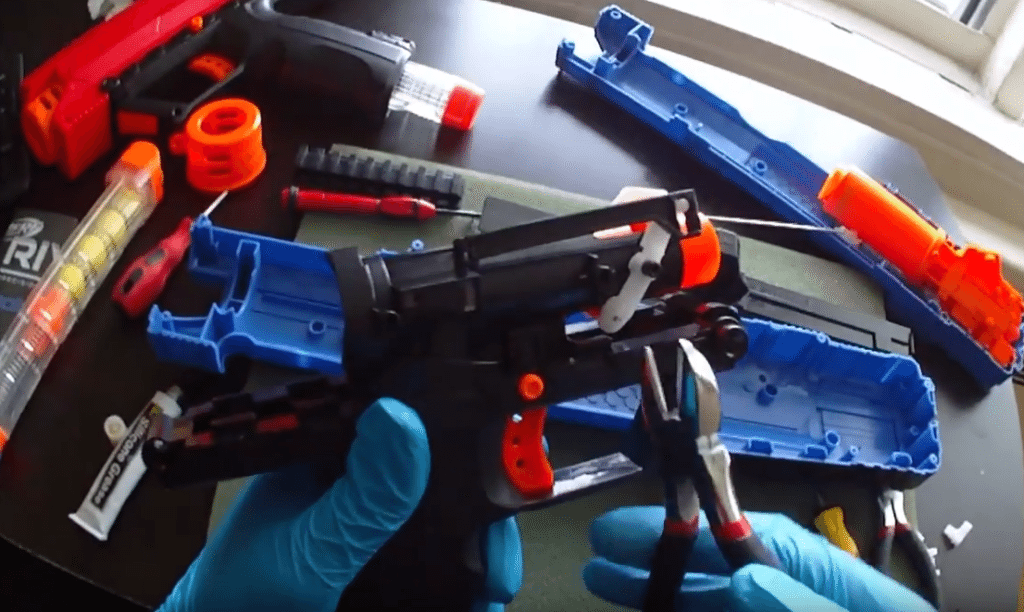
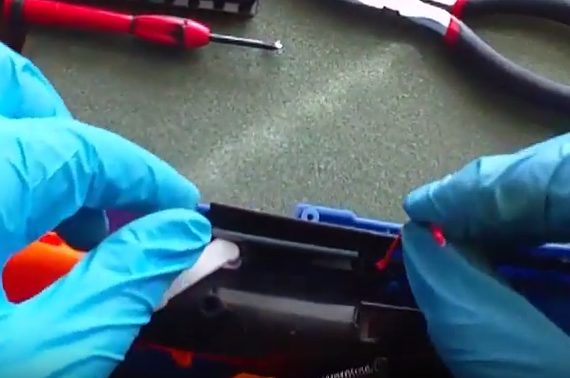
The white piece that I’m holding in my left hand in the picture is the piece I’m talking about. This part is responsible for opening and closing the “breech.” Having this white piece return to its original position before firing is what we want to happen. So, we need to add an extra spring to facilitate this movement. Lift up the flexible white arm and slip a spring onto the metal pin, then lower the white plastic arm back over the pin.
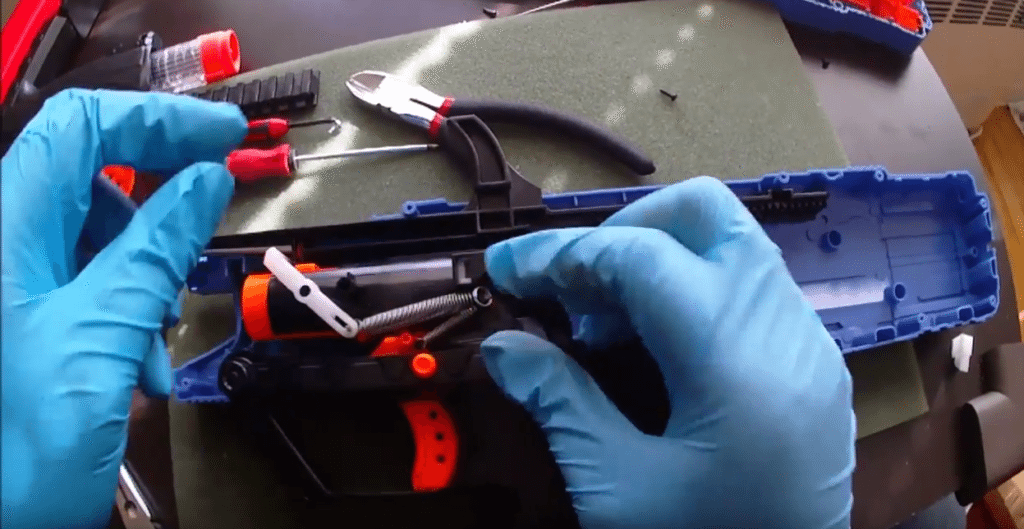
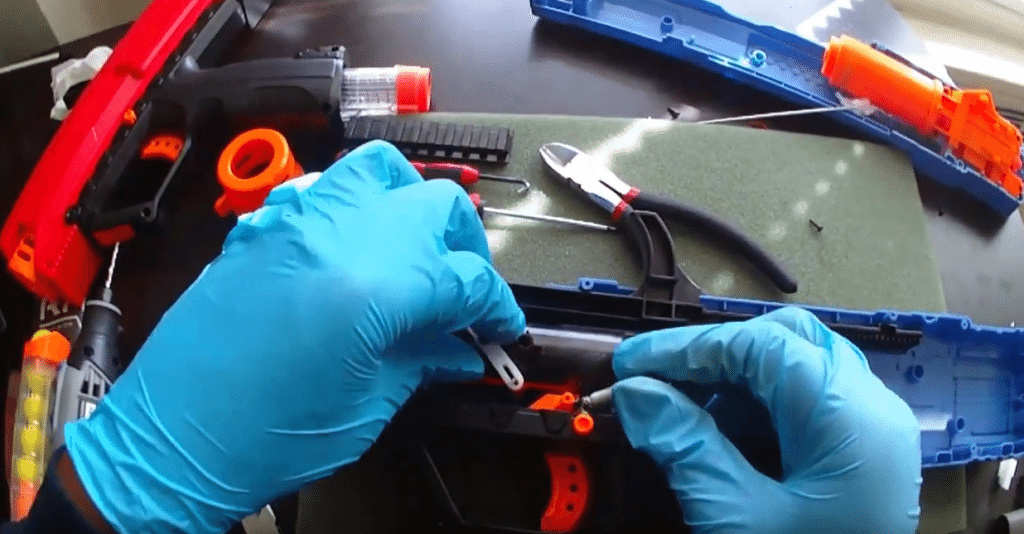
Slip the other end of the spring onto the same hook that the trigger return spring sits in. It’s right near my right index finger in the above picture. When you’re all done, it should look something like this. Just a lot less blurry. Unless you need glasses, and then you should probably get some. Otherwise, everything should be all good. If you’ve used a spring with the right amount of tension, you should be completely done with this step. To see what happens when you don’t use the right spring, see my YouTube.
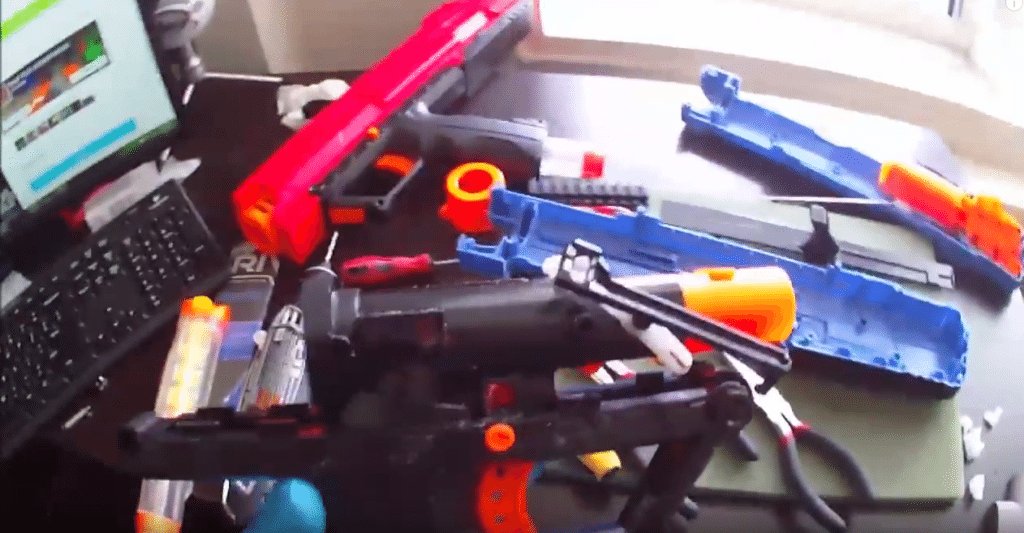
Step 8 (Final Step): Reassembly!
That’s it! Congrats! You’ve made it to the end of this Nerf Rival Apollo Mod Guide and lived to tell the story. Now, just go back to the beginning of the video where I disassemble the blaster and play it in reverse to see how to put it back together again. (Kidding.) Just replace all of the screws (there were 9 of them) and screw them in tight, but not too tight.
Once it’s all together again, now the fun part happens. You get to go outside, or wherever you feel comfortable shooting this thing, and do your test firing. Pull the priming handle all the way back and then let go — and that’s when the magic should happen.
If you haven’t managed to muck up this guide, the priming handle should snap all the way forward and you should be primed and ready to shoot. If the handle doesn’t move, only moves half way, it falls off, or you just hear pieces falling apart inside your blaster, kindly return to Step 1 or watch the video again in its entirety. Hahaha.

Nerf Rival Apollo Mod Guide: Final Thoughts.
That’s all folks! That’s all she wrote! Insert next cliche phrase here! Anyway guys, this has been my Nerf Rival Apollo Mod Guide. I gave it to you in two different ways: text and video. Consume it how you please, but either way — Hope you enjoyed it!
Onto my final thoughts on the Apollo after completing the mods in this guide. I think these mods are fantastic and I think everyone who is willing and able should definitely perform these mods on their Nerf Rival Apollo blaster. Removing the locks makes for a more fluid, more reliable blaster with fewer instances of jamming. These mods are very cool. Especially the return springs, I think that was the main focus of the whole Nerf Rival Apollo mod guide in the first place.
Operating the Apollo with those added springs makes a world of difference and the cool factor has gone way, way up. Style points, baby! The functionality is there, the tacti-coolness is there, and this mod makes it possible to very effectively dual-wield two Nerf Rival Apollo’s. What! But that’s all I have to say about that.
As always, guys, thanks for reading (and/or watching if you’ve visited my YouTube channel) my Nerf Rival Apollo Mod Guide!! I appreciate it! Let me know how you feel about this guide down below in the comments section! Do you think it’s worth it? Does it make the Apollo better? Will you attempt to complete these mods yourself? Sound off and let me know! And check out my other Mod Guides after you’re done with this one!


My husband was unjamming the gun and took it all apart including the gear box. Now we can’t figure out how to put it back together. Specifically the gear box. Can you send a how to? I was hoping I would be able to find a exploded parts diagram on the internet somewhere but no luck. It’s a Rival XV-700. Can you e-mail me directly? not sure if I’d be able to find my way back here to check on a response.
Do you still need the help? I’ve been extremely busy and hadn’t had a chance to respond to you… If you still need it, I can shoot a quick video or supply some pics or both. Let me know.
I’ve heard the gears are prone to jamming, and sure enough I have a broken gear (the one in the center) that’s preventing me from cycling the gun. Where could I find a replacement?
Unfortunately, I don’t know of anyone who has made replacement gears YET. I’m sure they probably will eventually, though. They’ve made replacement gears for blasters before, sometimes even metal replacement gears. Your best bet is to try to return or exchange it at a big local retailer. Sorry.
someone got my blaster and put it in the sand. I need to clean it completely, even the handle where the clip inserts has sand. Do you have a video for reassembling the handle especially the part that holds the clip?
I don’t, but I will probably make one soon. You haven’t been the first to have asked about something like that… Stay tuned
Details on the spring used in the breech assembly?
Where did you get your box of springs?
I got my springs from Home Depot, but they’re also available online. I thought I left a link in the article..?
Which spring was used on breech?
Can you help me to fix my rival blasters